Running an ecommerce store requires not only a lot of effort in the operational, logistics, and other aspects, but also a lot that you should do to improve your customers’ experience. Your marketing campaigns play an important role in forming a good experience for your customers.
From defining customer segments to creating targeted email campaigns, setting up automated welcome emails, cart abandonment emails, and winback campaigns, displaying personalized products to visitors based on their behavior and history… all of this requires a dedicated marketing automation platform with powerful targeting and cross-channel operation to create and serve the right messages at the optimal times.
Growmatik is a marketing automation platform that seamlessly integrates with Shopify stores. With its Shopify integration, you can sync your store data with Growmatik in real-time, enabling targeted marketing campaigns, personalized customer experiences, and data-driven business decisions.
By connecting your Shopify store with Growmatik, you can automate many of the tasks associated with growing your customers and sales. In this article, we will learn how to set up the Shopify integration and explore the best use cases for Growmatik in Shopify.
How to set up the Shopify integration
To integrate Growmatik with your Shopify store, you first need to add Growmatik as an app to your Shopify account. Here are the steps to follow:
1. Login to your Shopify dashboard and then navigate to the Shopify App Store.
2. Search for “Growmatik” and select it.
3. Click on the Add app button first and then select Install app.


Once Growmatik is installed, you will be prompted to create a Growmatik account which will be linked to your Shopify store. Choose a Growmatik plan that suits your needs.
4. In your Shopify dashboard, click to confirm the Growmatik subscription. This will connect your Shopify store to Growmatik.
Now, for Growmatik to function in your Shopify store, you need to enable the Growmatik App Embed block as well.
5. In your Shopify dashboard, go to Online Store > Themes > Customize.
6. Find the App Embeds section on the left sidebar and toggle on App Embed for Growmatik and save it.


Now, in order to enable Growmatik to detect guest checkouts, you will need to insert a script into Shopify’s order status page section. You can find instructions about it on this page.
With these steps, Growmatik should now be set up and integrated with your Shopify store.
Main use cases of Growmatik in Shopify
Growmatik automation can serve a range of channels, from emails to pop-ups, forms, and website personalization, with the goal of boosting sign-ups, increasing ecommerce sales, fostering customer loyalty, and increasing lifetime value.
The automation process in Growmatik is made possible by workflows, where one or multiple triggers are activated, as well as one or multiple actions that should occur when the trigger has happened.


“Trigger” can be an event or simply a custom segment among your customers.
Thanks to the massive filtration criteria covering real-time store behavior, purchase history, referral details, geolocation, RFM values, email activity, and more, you can precisely define your automation triggers. This makes it possible to create highly personalized automation workflows based on every customer’s preferences and behavior, increase engagement with your marketing campaign, and eventually increase your conversion rate.
To better understand how Growmatik can be used, let’s explore some of its main use cases.
Update customers about orders
We would like to set up a workflow that triggers when a new order is placed. The workflow will automatically send an email confirmation to the customer, including their order details and tracking information. Additionally, three days after the order is completed, a follow-up email will be sent to the customer requesting that they review their product. To set up this workflow, here are the steps you should follow:
1. Go to the Automation page in your Growmatik dashboard and click on the Add Workflow button.
2. Select + Add a Trigger and choose the Order Placed event from the list of available Shopify events.3. Click on the Save button to confirm your selection.


4. Add a new Action step by clicking on the plus icon and selecting Send Email.
5. Set a proper email subject, choose the email type as Transactional, and then click on Design Email.
Note: You can send both transactional or marketing (newsletter, promotional) email types with Growmatik.


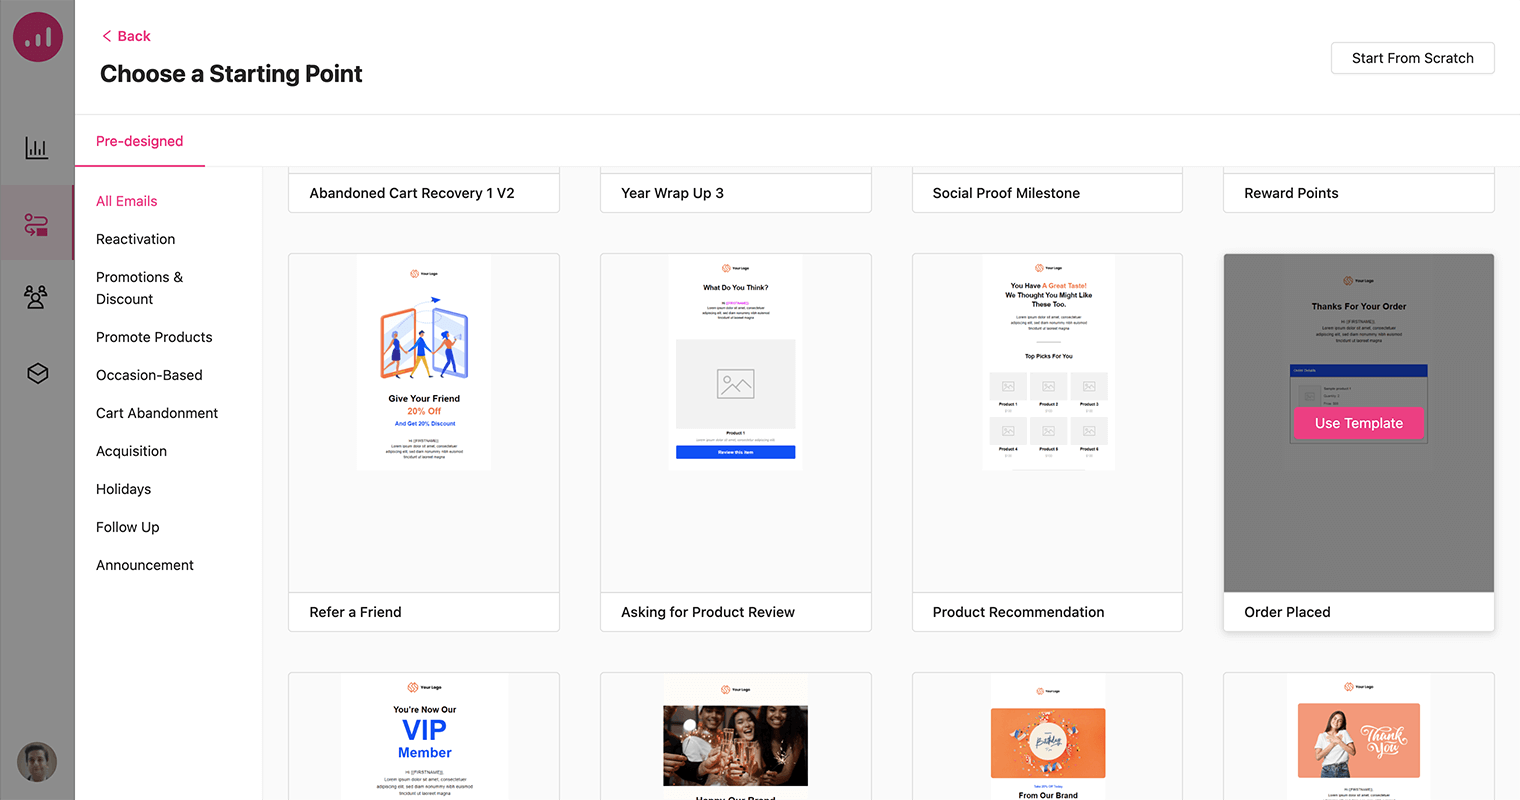
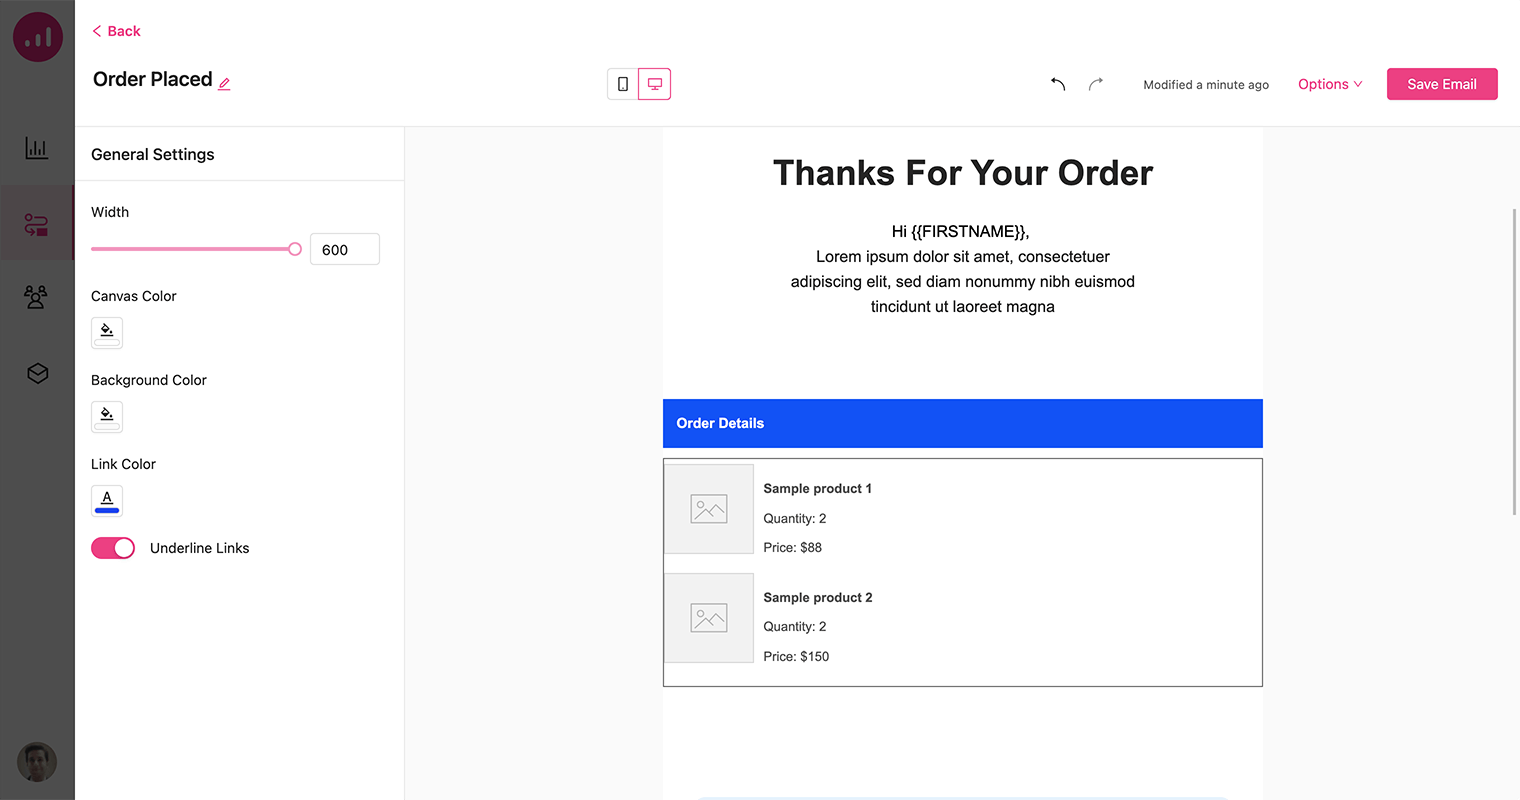
6. There is a wide range of pre-made email templates you can choose from, or you can start from scratch. Here, we choose the Order Placed template.


7. Once you have selected and named the template, the design will be displayed within the email builder area. Customize it as you wish and click on Save Email.


8. Save the step in the workflow.
9. Add a Wait Until step to your workflow for when the order is completed. Then, add a 3-day delay. Your workflow should look like the image below when you’re done.


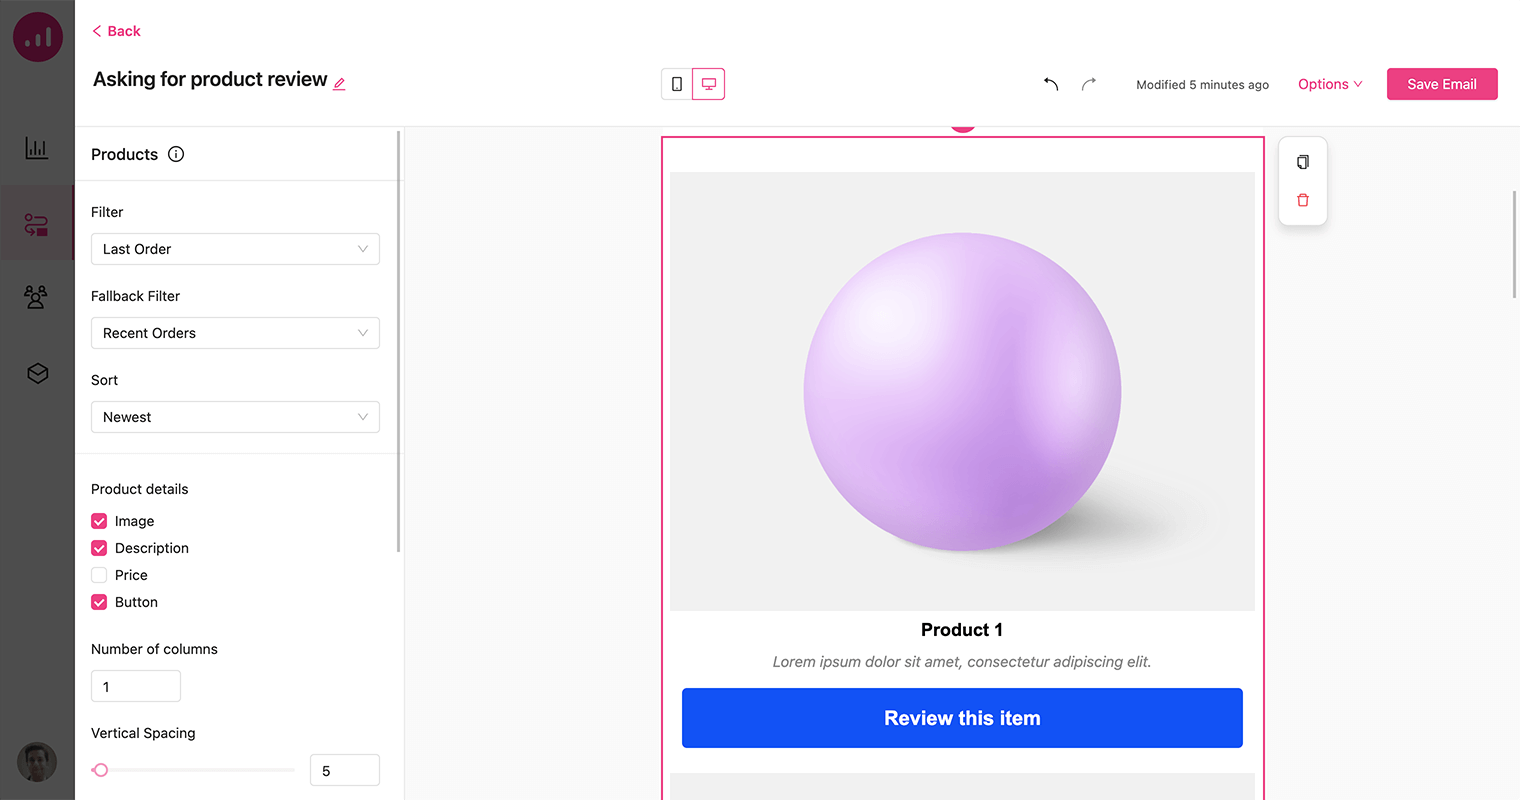
10. All you need to finish creating this workflow is to add an Email action after the delay step, and choose the Asking for Product Review template from the email design section. This email template shows the user’s last purchased product with a CTA button to review.


11. Finally, activate the workflow by toggling it on and save it.
Send smarter cart abandoned emails
Cart abandonment is a significant issue for many eCommerce businesses, and Shopify stores are no exception.
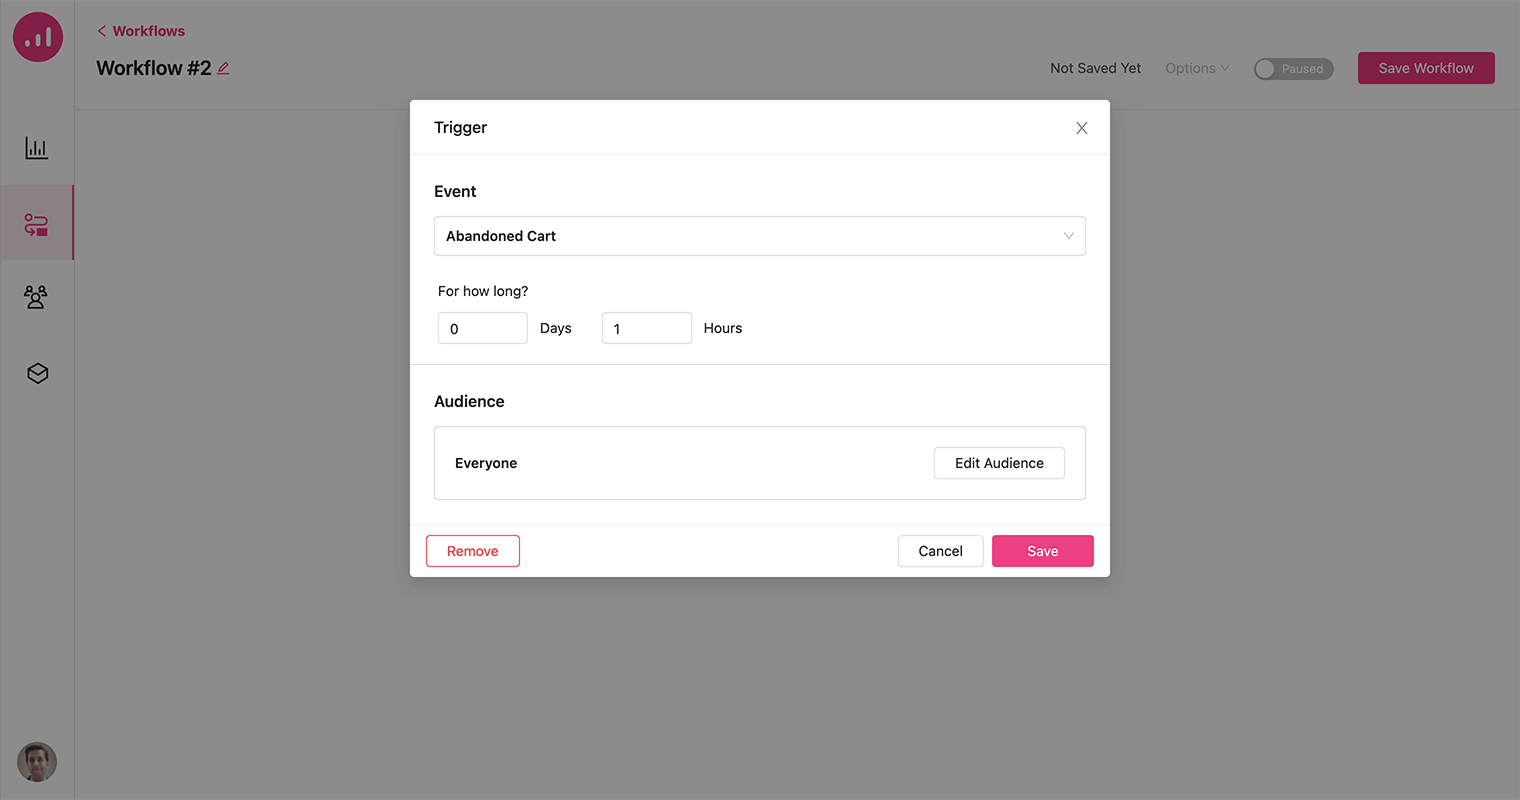
1. From the Automation page create a new workflow and choose the Abandoned Cart from the Shopify events as the workflow trigger.
2. Set an hour for the duration and click on the Save button.


3. Add a Send Email action. Choose the right email subject like “Finish Your Purchase and Get 10% Off – Don’t Miss Out”.
4. Choose one of the Abandoned Cart Recovery templates from the available recipes.


This email includes a product element and is set to show abandoned cart items. So, everyone who receives this email can see the abandoned items from the shopping cart. Another important item we need to include is a personalized discount coupon.
5. To add the coupon code to your email, simply click on the plus icon in the email builder to open the element options and select the Coupon element.


The coupon element gives you the flexibility to customize your discount by defining the amount and choosing whether it applies to the entire order or specific products. Moreover, you can also offer free shipping as part of the coupon deal.
6. Now, save the email and activate your Workflow.


Display tailored products in your Shopify store
Growmatik offers Shopify store owners the ability to display tailored products on their storefront. This feature allows you to personalize your website by showcasing products that are specifically curated for each individual visitor based on their behavior, interests, and purchase history.
1. From your Growmatik dashboard, open the Automation page and create a new workflow.
2. Select Page/Product Visit as the event trigger and specify the page URL for it.


3. To personalize your webpage, select Personalize Web Page as the action, and choose the page name or URL that you wish to personalize. Finally, click on the Personalize Page button to proceed.
4. You will be redirected to the page and have access to a number of elements for personalization. Using the plus icon, add a Product element to the page.
5. Under the Products Setting option, you can filter your products to display Similar to Previously Visited Items. In the event that the user has not previously visited any items, you have the option to define a fallback scenario where discounted products will be displayed instead.


6. Once you have finished customizing the appearance, click on the Save Personalization button to save your changes. Finally, you can activate your workflow to implement the personalized design.
Show personalized offers in popups
The use of popups to display personalized offers can also be an effective way to capture the attention of website visitors and encourage them to take action. However, it’s important to ensure that the popups are timed appropriately and targeted relevantly to avoid interfering with the user experience.
This example involves displaying cross-sell items that are associated with products that a visitor has previously viewed. The cross-sells will be shown via a popup to customers who have already made purchases and are located in France.
Let’s create a new workflow for it:
1. Add Country as the trigger and set France for it.
2. From the Audience section, choose the Placed Order filter.


As a result, the popup will only be displayed to customers who have previously placed an order and are located in France, ensuring that the personalized cross-sell offers are presented only to those who are most likely to be interested and engaged.
3. Add a Show Popup action and click on the Design popup button.
4. From the popup recipes, choose the Recommend Cross-Sells Related template. This will redirect you to the popup builder area.
5. Choose Cross-Sells Linked to Previously Visited Items as the product filter.


6. Feel free to customize the appearance of the popup to your liking, ensuring that it aligns with your brand image and complements the overall design of your website.
7. Save the popup and the workflow afterward.
Wrap up
By using Growmatik to set up automated campaigns for shopping cart abandonment and personalized discounts, you can recover lost potential sales and boost your customer recovery rate. Growmatik also allows you to display customized product recommendations and offers on your Shopify storefront and in targeted popup messages. The product and offer suggestions are tailored to each customer based on their browsing and buying behaviors.
With the introduction of Shopify integration to Growmatik, you can optimize the customer journey by creating relevant marketing campaigns, boosting their engagement with your products, and increasing the average order and lifetime value.
