Marketing automation plays a crucial role in today’s digital landscape, allowing businesses to streamline their marketing activities and deliver personalized experiences to their customers.
By combining the power of HubSpot and Growmatik, businesses can leverage advanced segmentation and automation capabilities to drive relevancy, engagement, and conversions.
In this article, we will delve into the HubSpot integration in Growmatik, exploring how it operates and uncovering some of the valuable use cases that can enhance HubSpot performance.
Understanding HubSpot Integration in Growmatik
HubSpot integration in Growmatik empowers tenants with three exclusive actions to manage various details about their HubSpot contacts (Learn about the HubSpot integration in Growmatik).


By selecting HubSpot as the action for automations, users can choose to Add/Update/Remove a contact in HubSpot. Additionally, they can set contact attributes, lead status, and life cycle stages directly in HubSpot.
The Benefits of Using HubSpot and Growmatik Together
Growmatik provides a comprehensive range of filtering criteria, boasting over 100 filters for segmentation. These filters encompass various parameters such as website activity, shopping details, referral details, RFM values, geolocation, and more.
By integrating HubSpot with Growmatik, businesses can capitalize on these advanced segmentation capabilities to hyper-target their HubSpot campaigns.
This level of precision allows for maximum relevancy in HubSpot marketing campaigns, resulting in increased engagement and improved conversion rates.
Use cases for Growmatik-HubSpot integration
Let’s dig into some real examples and use cases where Growmatik integration can benefit your HubSpot workflows and performance.
- Find the Automations page in Growmatik sidebar
- Click on New Automation > Start from Scratch > Rule or Workflow
- Choose a trigger for your automation
- Choose an audience for your automation
- Set the automation action as HubSpot
- Define the action parameters as explained in each example respectively.
1- Create a HubSpot user when a user signs up
When a visitor signs up on your website using Growmatik’s forms and popups or your own website forms, you can automatically add a contact in HubSpot, include their first name and the last city visited in their profile and set their lead status as New.
- Define the Form Sign Up as the trigger for your automation
- Define HubSpot as the action and set the following parameters


This ensures that new leads are captured and properly categorized within your HubSpot database.
2- Update the user profile when a user does not engage
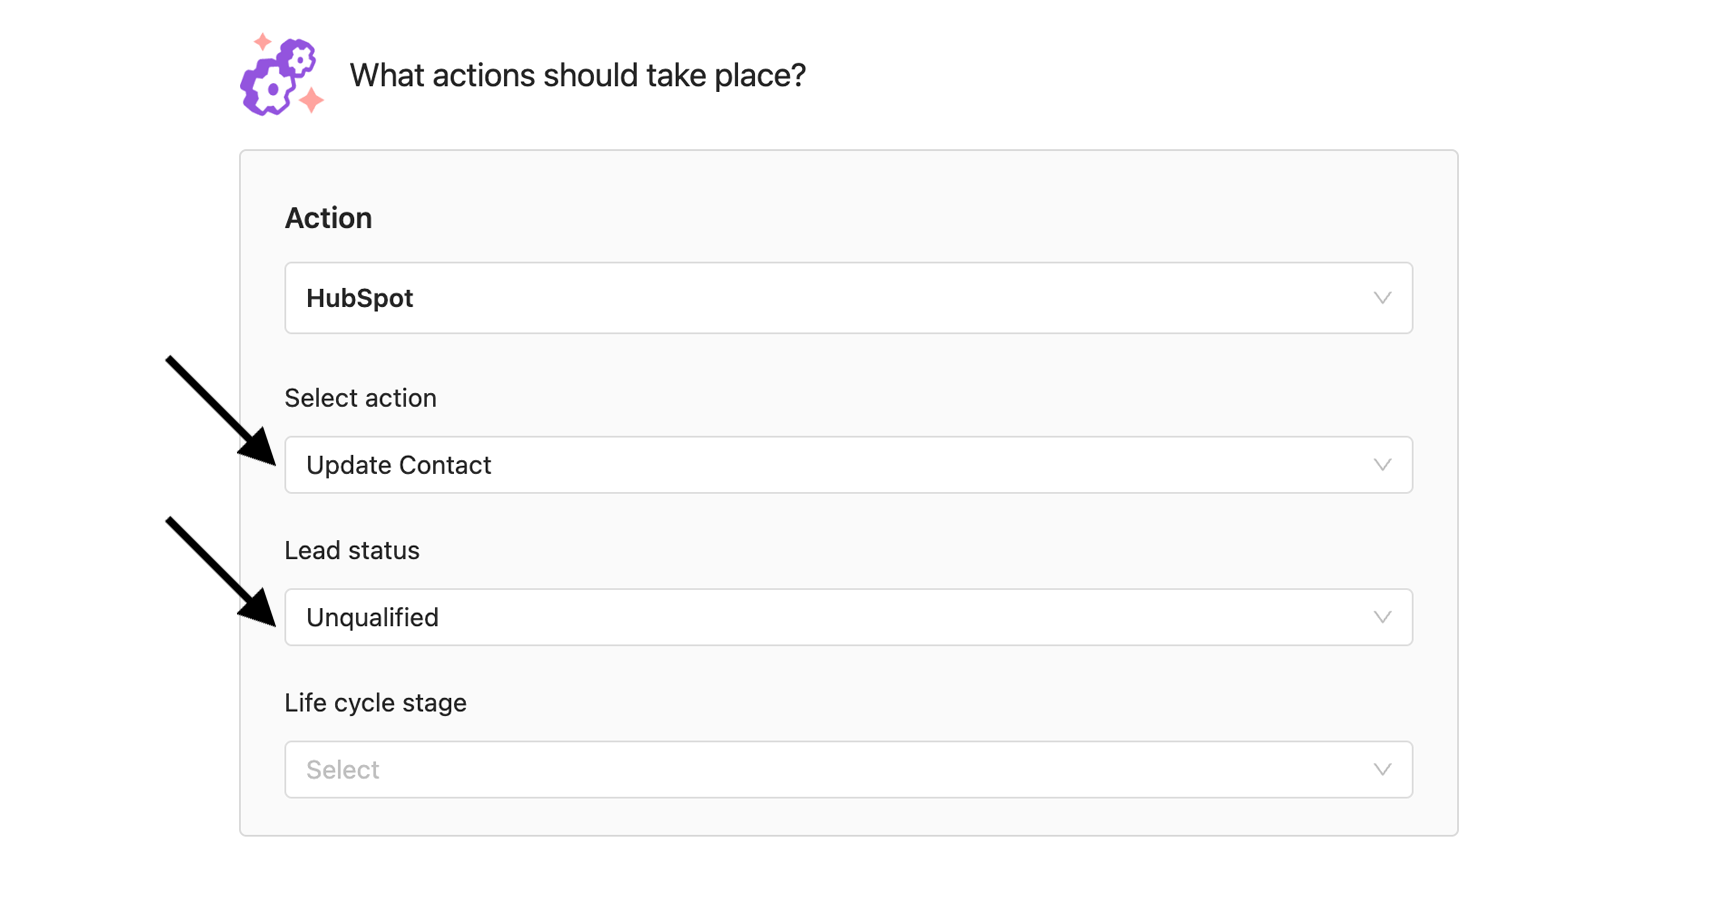
For subscribers who click on a Growmatik email campaign but do not make a purchase, you can set their HubSpot lead status as Unqualified.
- Define No Event as the trigger for your automation
- Define a custom audience with following filters


- Define HubSpot as the action and set the following parameters


This allows for effective lead nurturing and targeted follow-up campaigns to encourage conversions.
3- Remove user from HubSpot when unsubscribed from marketing emails
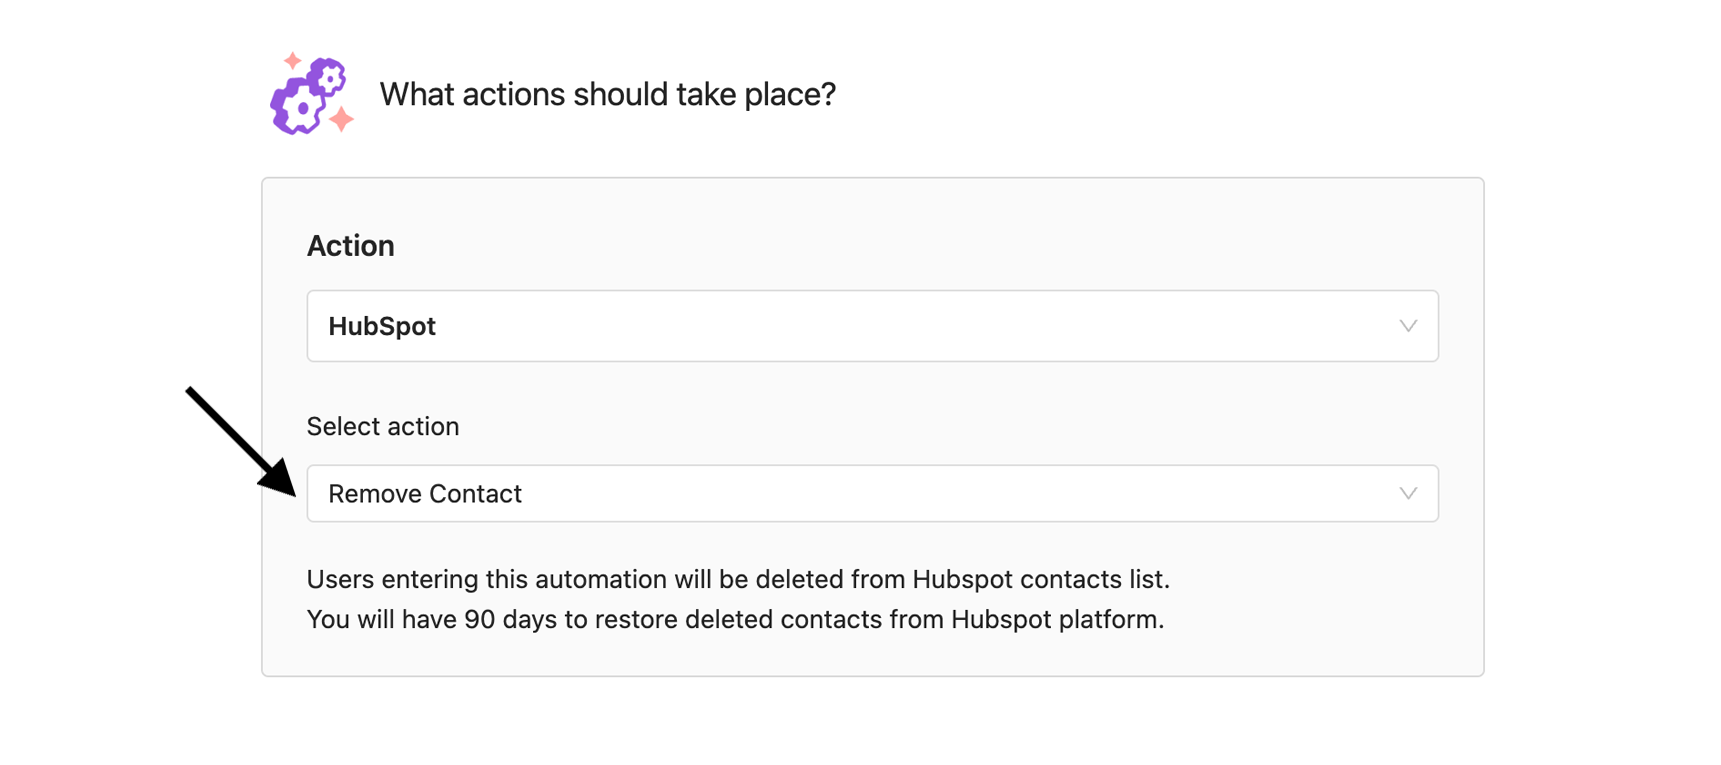
If a person unsubscribes from your email list, you can promptly remove their contact from HubSpot. This helps maintain a clean and up-to-date contact database, ensuring compliance with data privacy regulations.
- Define Email Activity > Unsubscribed from Emails as the trigger for your automation
- Choose Commercial Emails as the email type
- Define HubSpot as the action and set the following parameters


4- Set lifecycle stage based on RFM values
By leveraging the RFM (Recency, Frequency, Monetary) scoring in Growmatik, you can identify customers with a score equal to or higher than 3 and automatically set their HubSpot lifecycle stage as Sales Qualified Lead. This ensures that your sales team can focus their efforts on leads that are more likely to convert.
- Define No Event as the trigger for your automation
- Define a custom audience with following filters


- Define HubSpot as the action and set the following parameters


5- Recognize returning visitors
Recognizing the value of returning customers, you can set their HubSpot lifecycle stage as Marketing Qualified Lead. This categorization helps prioritize follow-up activities, ensuring that these valuable customers receive the appropriate level of attention.
- Define No Event as the trigger for your automation
- Define a custom audience with following filters


- Define HubSpot as the action and set the following parameters


6- Recognize users based on their website activity
If a visitor has viewed specific products (x, y, z) and has spent a total of 30 minutes on your website, you can set their HubSpot lifecycle stage as Opportunity. This indicates that the visitor has shown strong interest and is a potential opportunity for conversion, allowing your sales team to engage with them effectively.
- Define No Event as the trigger for your automation
- Define a custom audience with following filters


- Define HubSpot as the action and set the following parameters


Wrapping up
The integration between HubSpot and Growmatik makes possible a powerful combination of two of the best marketing automation platforms. Allowing businesses to deliver personalized experiences and drive higher conversions with their HubSpot campaigns.
It’s important to note that while the current integration offers one-way synching from Growmatik to HubSpot, future updates will enable bilateral synching. This means that businesses will have the ability to update Growmatik automations and segmentation using HubSpot as well, providing a seamless and synchronized marketing automation experience.
